When making doll and baby clothes I sometimes need designs to be really small. Some digitizers are great about having smaller designs but pretty standard size is the 4×4 or just slightly smaller than that. A 4×4 does NOT fit on a dolly bodice…and sometimes it is tight fitting it on a baby bodice too. The absolute easiest way to resize designs is to use embroidery software. The software will already have the brains to change the stitch density etc. But if you are like me and you either don’t have embroidery software or you do have it but it doesn’t work well (that’s me!!) this is a way I have found to be able to get designs small enough.
I recently made a bunch of baby bandanna bibs. They were soo cute!
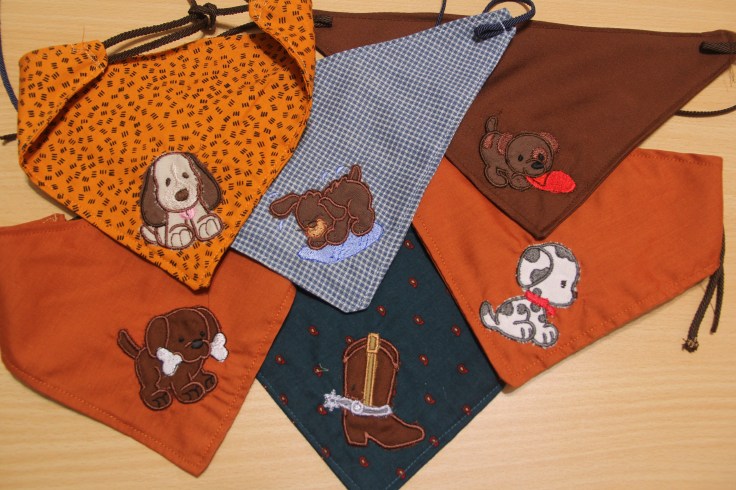
The bandannas were really small though and the Puppy dog applique set I really wanted to use was just a little too big. They are from Designs by JuJu and the set is called “Precious Puppies applique set”. I needed them a little bit smaller to fit in the corner of the bibs without having them disappear under the baby’s chin.
So I tried a new (new to me any 😀 ) technique. If you change the density of the stitches on the Ellisimo you can shrink designs down quite a bit more than the normal 60% that the machine normally allows.
My mother made a outfit for a baby boy doll and wanted a really small rocking horse in the middle. She used this technique plus using her software and got this…
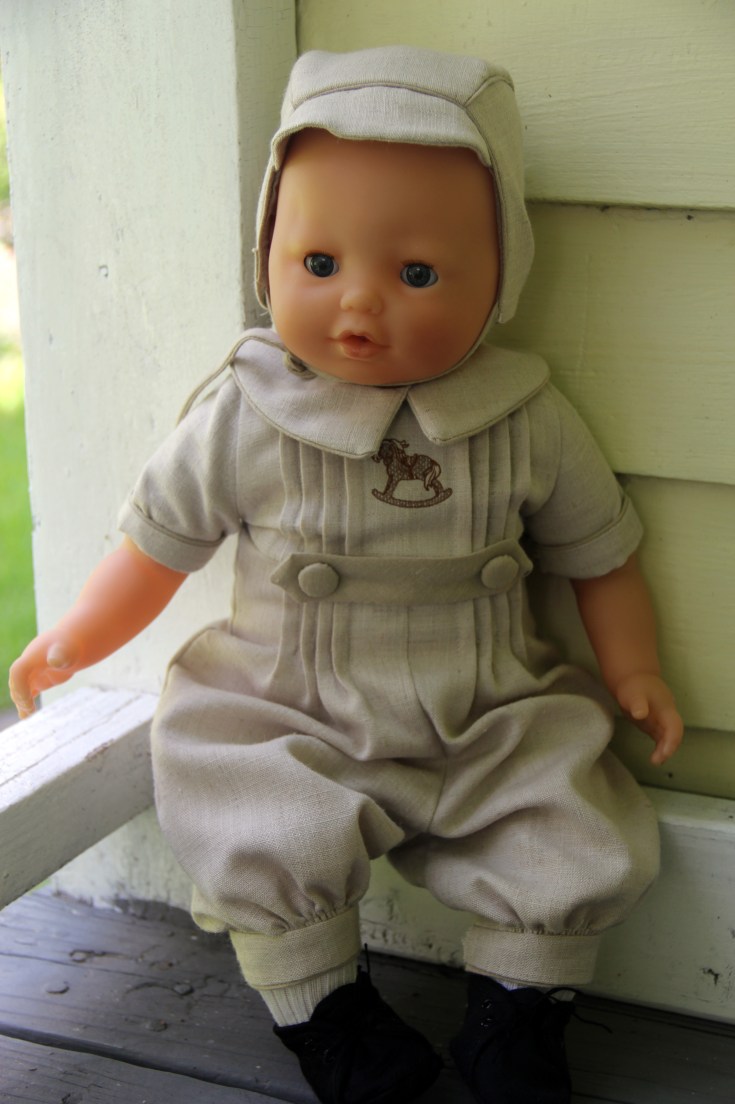
She made it as small as possible on her software…and then put it on the machine and changed the density to the lowest setting and shrank it further. The design was a freebie from Oregon Patchwork. (see it here) It was originally a design for a 4×4 hoop. Didn’t the outfit turn out adorable? She drafted the pattern for the outfit herself. She has more details about it on her pinterest board.

I do not know if this technique would work as well on a filled embroidery design. I used it on applique designs…and My mother did a redwork design. Both of which have fewer stitches than a filled design. This is not a completely fool proof method. However it is a option you can try if you really need a design smaller.
Here is the step-by-step with pictures for the process
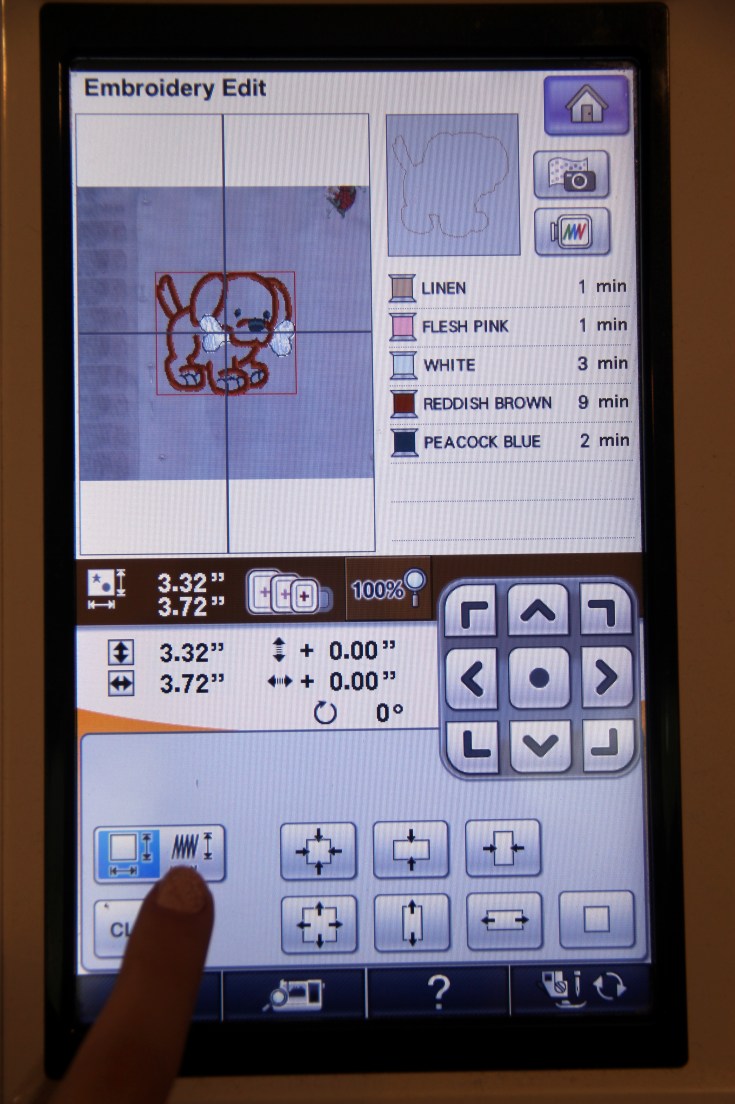
- First set you image, then click the “Size” button (notice the original size of the design is 3.32×3.72)

2. Once on the size screen click on this button that stands for density. It looks like a upright zigzag stitch
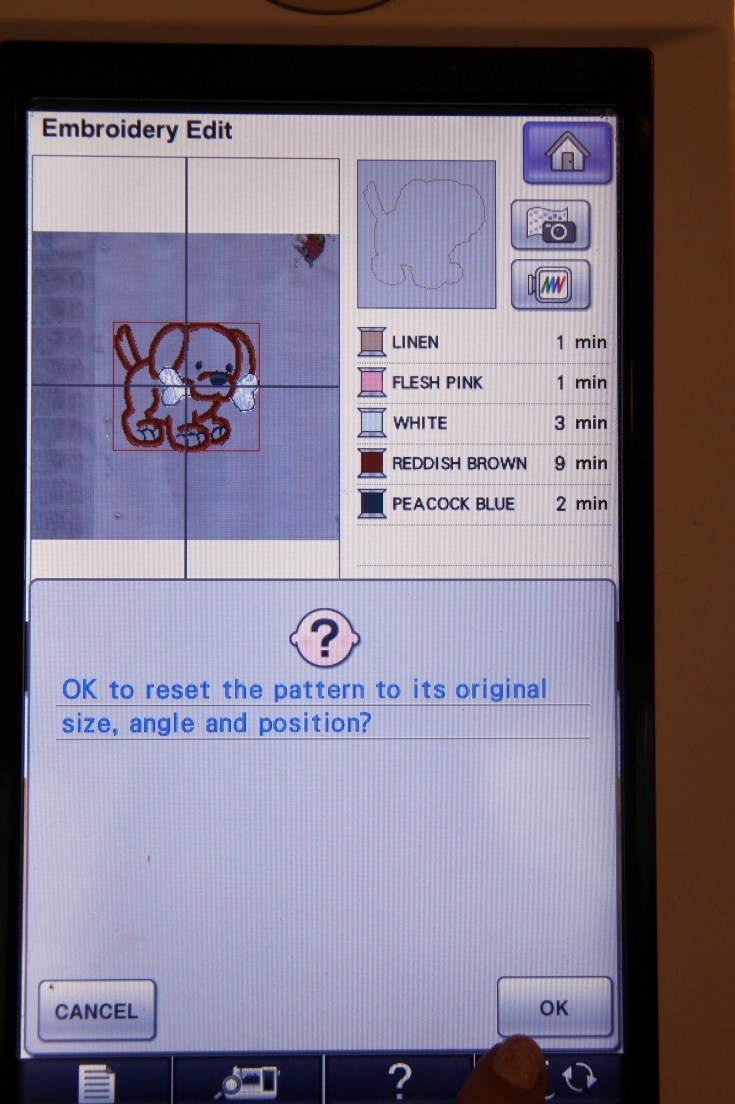
3. It will ask you if it can return the image to original size and position etc. (even if you haven’t done anything to the image it asks this.) click “ok”
4. Then you have the option of changing the density. On the applique ones I had a little trouble with getting a clean edge on the first few designs. I didn’t need it as small as possible so I experimented with the lowest setting of density (80%) and the few options above (90% etc). I would say don’t make it any smaller than you have to for the over all image size you need for the best results.


5. Press the “shrink” button until you get to the desired size. When I took the density all the way down, and then made it as small as possible I ended up with a design that was 1.99x 2.22


Here is a few more pics of the bandanas I made…such cute puppies!


I don’t make any promises that this will work on every design, and I do recommend doing a sample stitch out to test it. But it is a tip that may be useful when trying to get things a little smaller before you can invest in a embroidery software 🙂 Let me know what you think and if you’ve tried this!

June 16, 2016 at 1:50 pm
I tried it!!!! It works beautifully. Doing doll clothes requires tiny embroidery. What a machine the Ellisimo is! Thank you for such a clear tutorial.
LikeLike